Teachflix

banner

If you are looking for a website that has curated education related videos, look no further. Teachflix has you covered. Just go here, click on the appropriate age group, content area, or just do a simple search by keyword. It is a fairly new site, so their library will grow as time goes on. Give it a try and see what you might come across that is useful and engaging for your students.

Embed a YouTube Video Into Your Blog

Go to the video you want on YouTube.

Under the video you will see a Share button. Click that.

Screen Shot 2015-08-21 at 10.22.15 AM.png

A new little menu pops up that has Share, Embed, Email.

Click Embed.

Screen Shot 2015-08-21 at 10.22.57 AM.png

Under the Embed code, click Show More.

Screen Shot 2015-08-21 at 10.23.30 AM.png

Change the Video Size to Custom Size.

Screen Shot 2015-08-21 at 10.24.12 AM.png

In the first box next to that, type 480 (this is the width of the video that best fits a blog post).

The height box automatically fills in.

Screen Shot 2015-08-21 at 10.24.46 AM.png

Make sure “Show suggested videos when video finishes” is UNCHECKED.

Screen Shot 2015-08-21 at 10.25.24 AM.png

Scroll back up the page a little and copy the Embed Code that is there now. Highlight and copy that code.

Screen Shot 2015-08-21 at 10.29.17 AM.png


Inside your blog Dashboard, this will work whether you are creating a new Post or a new Page.


Create a New Post (or Page).

Screen Shot 2015-08-21 at 10.31.39 AM.png

Title it.

Screen Shot 2015-08-21 at 10.32.02 AM.png

Click on the Text tab on the right side of the post window.

Screen Shot 2015-08-21 at 10.32.46 AM.png

Paste the Embed code into the post window.

Screen Shot 2015-08-21 at 10.33.20 AM.png

Now you are ready to either Publish, Preview, or add more text to it.


Social Media for Professional Growth

Anyone who knows me knows that I find a lot of value in Twitter. It has been my go-to source for connecting me with inspiring educators around the globe. I have learned from and with technologists in Australia, education department officials in Israel, design thinking teachers in Scotland, teachers and administrators across the North America, mentored student PBL groups in Oklahoma, and even discussed the State of the Union live with students from Philadelphia. Twitter is simply a powerful tool for learning.

WOISD staff have used Twitter to connect their students with authors, politicians, experts in other fields, and even a Holocaust survivor. Their lives have been changed and their learning improved because of a social media tool.

This video gives a quick testimonial on how one school district uses Twitter to make a difference in their classrooms. If you want to get started on Twitter, shoot me a note. If you start this school year modeling for our students how to utilize social media as a learner, you are helping them develop a valuable, lifelong skill.

History in Video

Screen Shot 2014-12-31 at 10.48.22 AM

Looking for some historical media to make a lesson pop? Or maybe you’re trying to find the right piece to begin that Socratic conversation with your students? Regardless, PBS comes through for you. Check out Newseum Digital Classroom where PBS has compiled a large collection of videos with summaries, essential questions, and links to continue further inquiry work on the subject. Great stuff. Don’t miss out.

Adding Movement to Math (or any subject) with Technology

I thought this was a great idea worth sharing. It is similar to what Robin White does with her middle school math students. It’s easier to setup than you think. I’d be happy to help you design something similar for your students. Even if you don’t have the devices in your room, the kids have them in their pockets. Give it a try!

Paper Slide Video + Youtube Capture App

The following is a cross posting from Shelly Hugghins’s iPod blog.

I asked my Spanish I students to review content topics by creating some paper slide videos to demonstrate their ownership of content at the end of semester one.  First, and most importantly, I explained the concept of a paper slide video, then asked them their opinions on the relevance of the activity.  After careful thought, my students felt this would be a great review method. 

We identified certain topics for review, and the students promptly began to work on their slides.  We decided to use the Youtube Capture app on our iPads to film the videos.  This choice turned out to be super easy and convenient for a few reasons:

  • Students already have Gmail accounts with Youtube channels
  • Students already have eportfolios established via our student blogs
  • Youtube Capture makes pulling clips together to create a video extremely user friendly
  • Students shoot the video inside the app, finish the editing process, send the video to upload and publish to their channel seamlessly

Of course, if you are shooting paper slide videos, there is really no need to worry about clips.  But, my Spanish II students also used this app to shoot their Christmas cookie videos, which did require them to shoot in sections or clips.

In both cases, my students rated the app very highly for these reasons:

  • Ease of use
  • Students were already familiar with Youtube
  • No need to create a new account for yet another app
  • Students could edit more easily than in iMovie if they needed to edit their cookie video
  • Processing time for the videos was very short
  • Youtube Capture + Paper slide video was a great way to review and share what they had learned

Here is an example video created by one of my Spanish I students for review of expressing a few of her likes and dislikes in Spanish:

The student feedback was so positive that I will continue to offer students the opportunity to demonstrate their learning in this way going forward.  However, I won’t wait until the end of the semester for review.  I am going to add this as an assignment or testing choice as we move through our content.  Do you have students create paper slide videos?  If so, what apps or tools do you use to process and share your videos?  Have you or your students used the Youtube Capture app?  I would love to hear about your experiences.

Explain Everything: an app on the iPad

Some of you may have been considering a way to do some easy recordings that your students can follow from home. Well, Explain Everything might be what you are looking for. Take a look at the tutorial video below. The narrator walks you through the entire process showing you all of the tool options. What is nice about this app is that when you are through with your video, you can export it straight to YouTube and then embed that YouTube video directly into your blog. The kids can do the same with the Google accounts, so that means you can have them teach the concept back to you while recording it on the iPad and showcasing their learning on the eportfolios.

As always, let me know if you have any questions that I can help you with. I’m always happy to come work with you and the students in implementing a tool like this.


Using your iPad to shoot video & upload to YouTube plus QR Code

Using your iPad to shoot video & upload to YouTube plus QR Code

Teachers as LearnersSo you’re interested in posting QR codes (like the one to the left) around your classroom to link to videos you found that might be of interest to the current topic of study. Or maybe you decided that posting a QR code next to your door or room number will allow parents and students a chance to watch a video introducing you and your classroom during open house. Well, here is what you need to do.

I realize this looks like a lot of steps, but I was trying to be very specific for those not comfortable with their tech use. Trust me, it is a very quick process after you go through it once and see the workflow. Use the previous post titled “How-To: Upload your video from the iPad to YouTube & embed it in your blog” to learn how to embed the video you create into your blog, if you are so inclined.  Let me know if you need any help. If you see anything that differs for you in the steps below, let me know and I will check it out.

  • Open the Camera app

  • Make sure the still/video icon in the bottom right corner is over to video

  • Shoot your video using the Record button to start and stop. (remember you can use the camera switching button to select the front camera or back camera, it looks like a camera with arrows circling it)

  • Once you have your video recorded, close the Camera app.

  • Open the Photos app.

  • Find your video and tap on it to open it.

  • Tap the rectangle box with the arrow in it in the top right corner.

  • Tap YouTube

  • It will ask you to log in to your account (Username is your school email address with password the same as your school email password). NOTE: If you get an error message during this process or the upload, there is a very good chance that you have NEVER uploaded a video to YouTube before. Therefore, you don’t technically have an account (or channel) to upload it to. See directions to fix that below.

  • Add a Title

  • Add a short Description

  • Change the Category to Education (or whatever you’d like)

  • Make sure Public is selected so anyone can view the video

  • Tap Publish (your video will optimize and then upload, so be patient)

  • You will get a popup notice telling you that your video is ready to go

Now, your video is on your YouTube account. Here is how you turn your video (or the link to it) into a QR code that you can print out, put on your blog, or put just about anywhere.

  • On your laptop, go into your school mail

  • At the top of the page, click on More and select YouTube

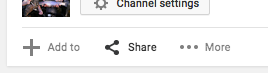
  • Click on your icon/name in the top right corner of the screen

  • Click on My Channel

  • Click on the link Videos in the middle of the screen (this lists all of the videos you have uploaded)

  • Click on the video you want to use

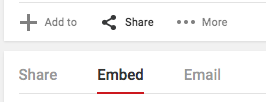
  • Underneath your video, you will see a link that says Share. Click on Share

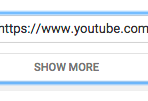
  • Copy the link it gives you (Command C on a Mac)

  • Open a new tab and go here: http://tiny.cc/

  • Paste in the link in the box in the middle of the page

  • Click Tiny

  • The page will refresh and a new link and QR code will appear below where you pasted the link.

  • Click Get QR

  • Click Print QR to get the larger size that will be noticeable by your door.

PRO TIP: If you like doing this and want to do more in the future, go ahead and create a free account on the tiny.cc site. This will allow you to automatically save every shortened link and QR code you create on their site to refer back to later.

PRO TIP #2: You can embed the QR code into your blog so readers can access them online as well.

*******************************************************

Do the following steps ONLY if you have never logged into your YouTube acount to Upload videos before.

Setting up your YouTube account in your school mail

NOTE: If you’ve never uploaded a video to your YouTube account, you must use a web browser on a computer to set the account up. Otherwise, your uploads will not work since there is no “channel” to upload to. Follow these directions:

  • On your laptop, go into your school mail

  • At the top of the page, click on More and select YouTube

  • If it asks you to log in, use your school email address as the username and your email password as the password. Follow the steps it gives you.

  • If it doesn’t ask you to log in, then click the Upload button at the top of the screen. It will either force you to log in, or it will take you straight to the Upload page. If it takes you straight to the Upload page, then your account is already setup and ready to go.